Initialization
The following sections are designed to guide a user through initializing and configuring a project to enable the full functionality of MDK. Actions described below instruct the user to set up a brand new MagicDraw project that is MDK-enabled. An MDK-enabled project means that the entire project model will be able to sync with MMS and generate views for use in View Editor.
Create New Project
First you will need to create (or open and existing) project in Cameo/Magicdraw. To open a new project in Cameo: 1. Open MagicDraw
File > New Project
Select “SysML Project” under the “Systems Engineering” section in the left side of the window
Name the Project
Choose project save location
Select “OK”
See message about System Engineering perspective
Perspectives switch the application to the graphical user interface designed for a specific role (such as systems engineer or analyst). Perspective options as well as details about the perspectives may be found by going to the top ribbon Options > Perspectives
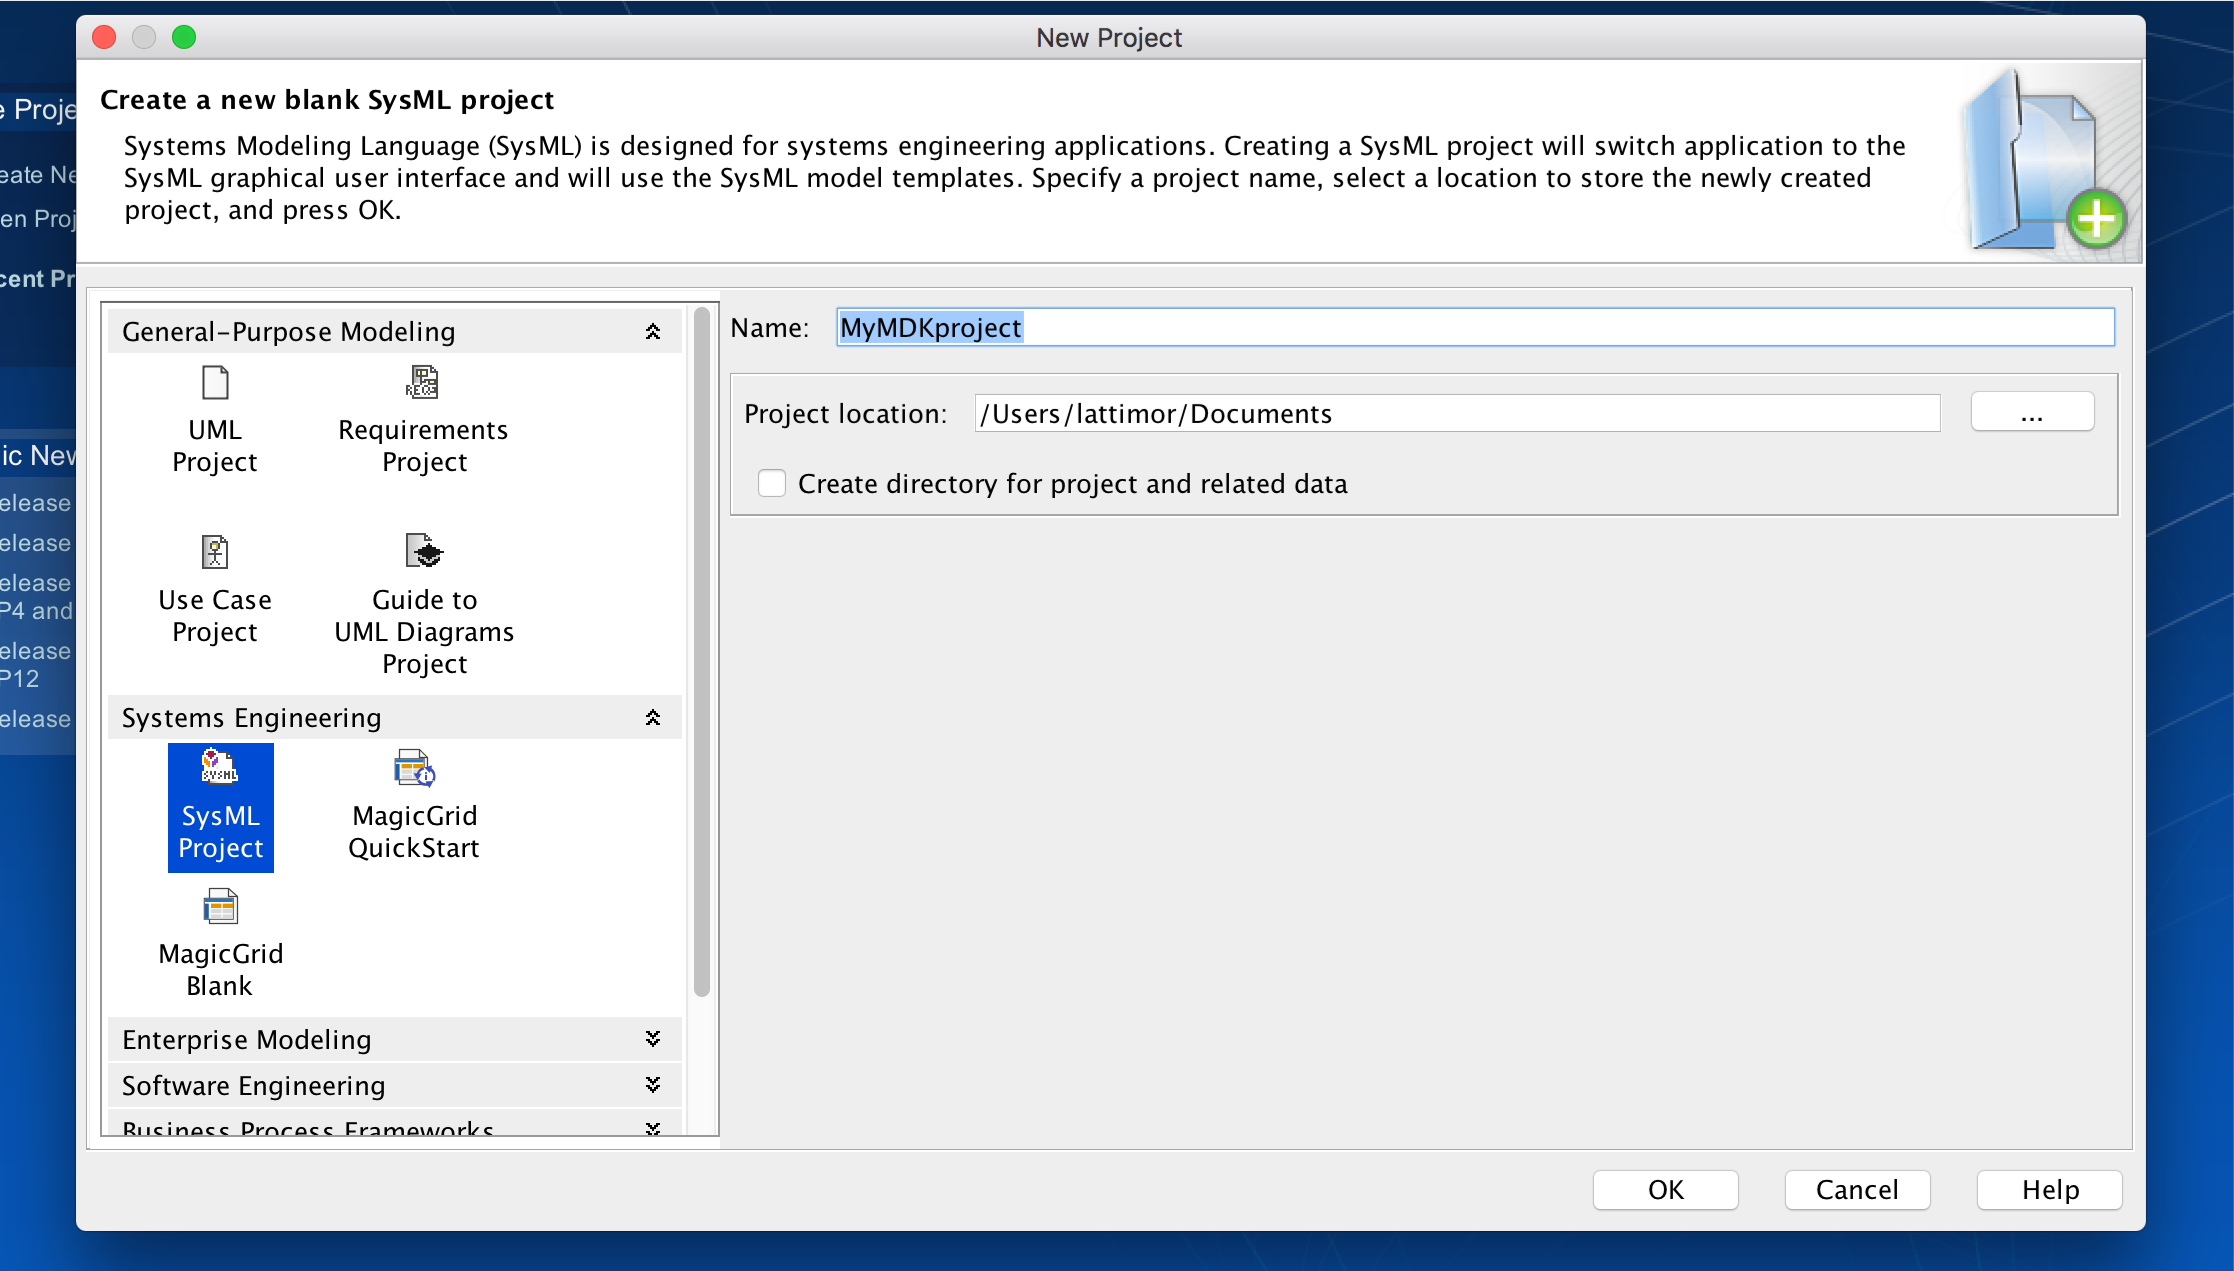
Fig. 1 Create a new SysML project
Import MDK Module to Project
Once you have a new or existing project open you will need to mount the MDK model library (or Module) to your project. To mount the model library:
Go to Options>>Project Usages
Select “Use Project”
Select “From predefined location”
Select “<install.root> /profiles” under paths to used projects
Select “SysML Extensions.mdxml” from the list of projects
Select “Finish”
- See message about showing Auxiliary Resources - choose either
Showing Auxiliary resources allows project usages to be seen in the containment tree
Click “OK”
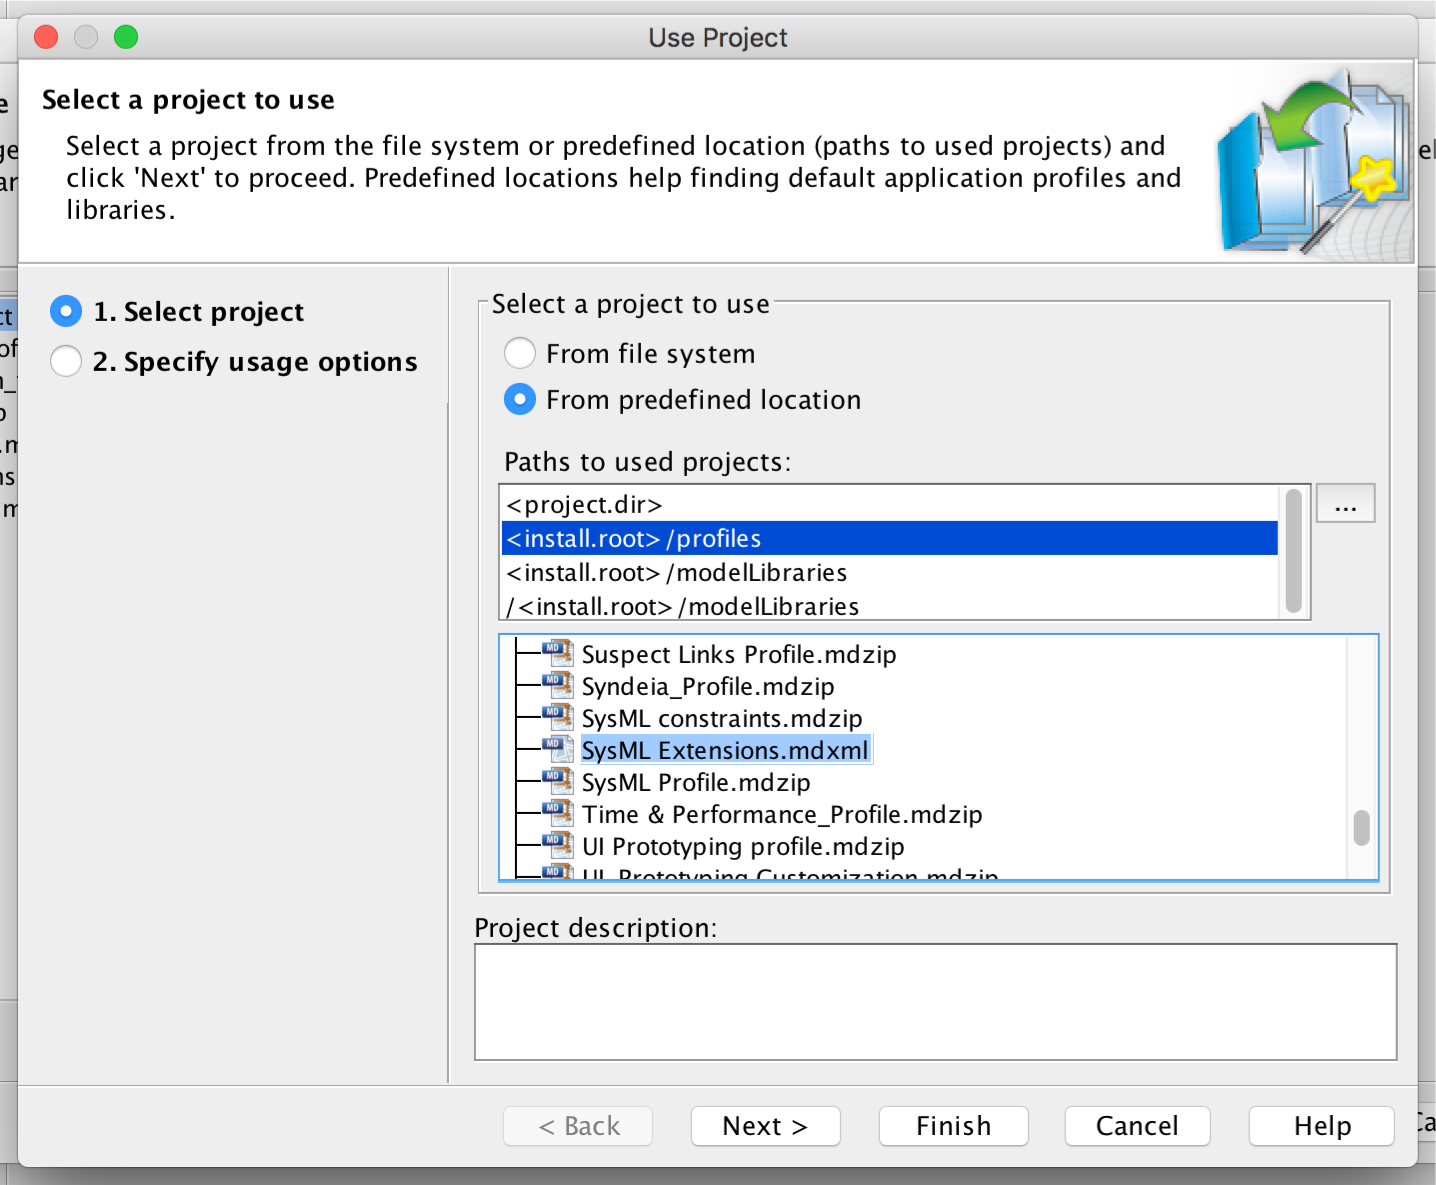
Fig. 2 Importing SysML Extensions
Enable MBEE Integration
As of version 5.1.0 there are two ways to configure your model to connect to the Model Management System and View Editor (5.1.0+ only).
Configure Model for MMS and View Editor
Configuration via Project Options (New 5.1.0+)
This is the new (preferred) way to configure MDK models. This not only allows you to configure your model without the use of the stereotype/tag, it also allows the configuration of the “Open in View Editor” menu option when right-clicking on a view.
Note
Projects previously configured with the <<ModelManagementSystem>> stereotype will have their settings automatically migrated to Project Options.
Click “Options” in the menu bar at the top and select “Project” to open the Project Options Dialog.
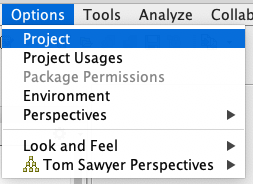
Fig. 3 Menu for opening project options
In the dialog box that pops up select “General>MBEE” (For TWC projects you may need to lock them)
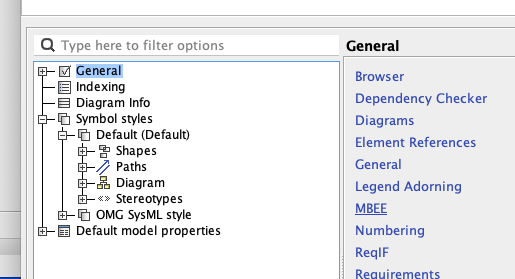
Fig. 4 Where to select MBEE options in Project Options Dialog
To enable MMS and View Editor integration you must first set
Enable MBEE Integrationto true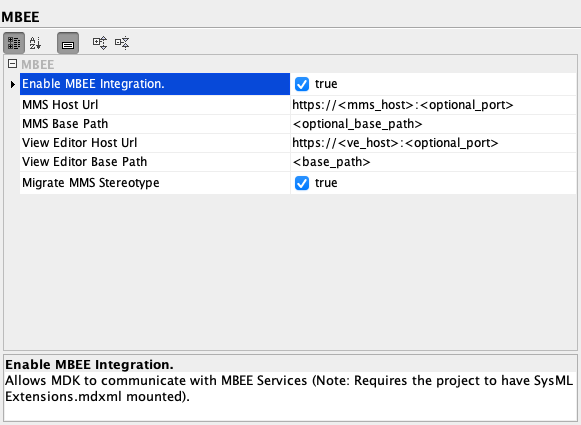
Fig. 5 View of the options available for MBEE configuration
Next enter the URL’s for MMS and VE in their respective fields (see image above).
Warning
You must specify any path (i.e. anything after the .extension or :port)
via the base path property for the specific service or it will be ignored.
Finally, click
Okayto save your selections.
Warning
If you haven’t already mounted SysML Extensions to your project. MDK will throw a warning and
disable MBEE Integration. Add the profile and then re-enable in Project Options
Configuration via Stereotype Tag (pre 5.1.0)
First you must apply the Model Management System Stereotype:
Right click “Model” package > Specification
If greyed out, Model needs to be locked for teamwork before editing: Right click “Model” package > Lock element for edit
Select “Applied Stereotype” and “…” in the top right corner of the section to browse for stereotype
Search applied stereotypes for “MMS”
Select “Model Management System” stereotype
Select “Apply”
Model specification should now have Model Management System stereotype in its specification
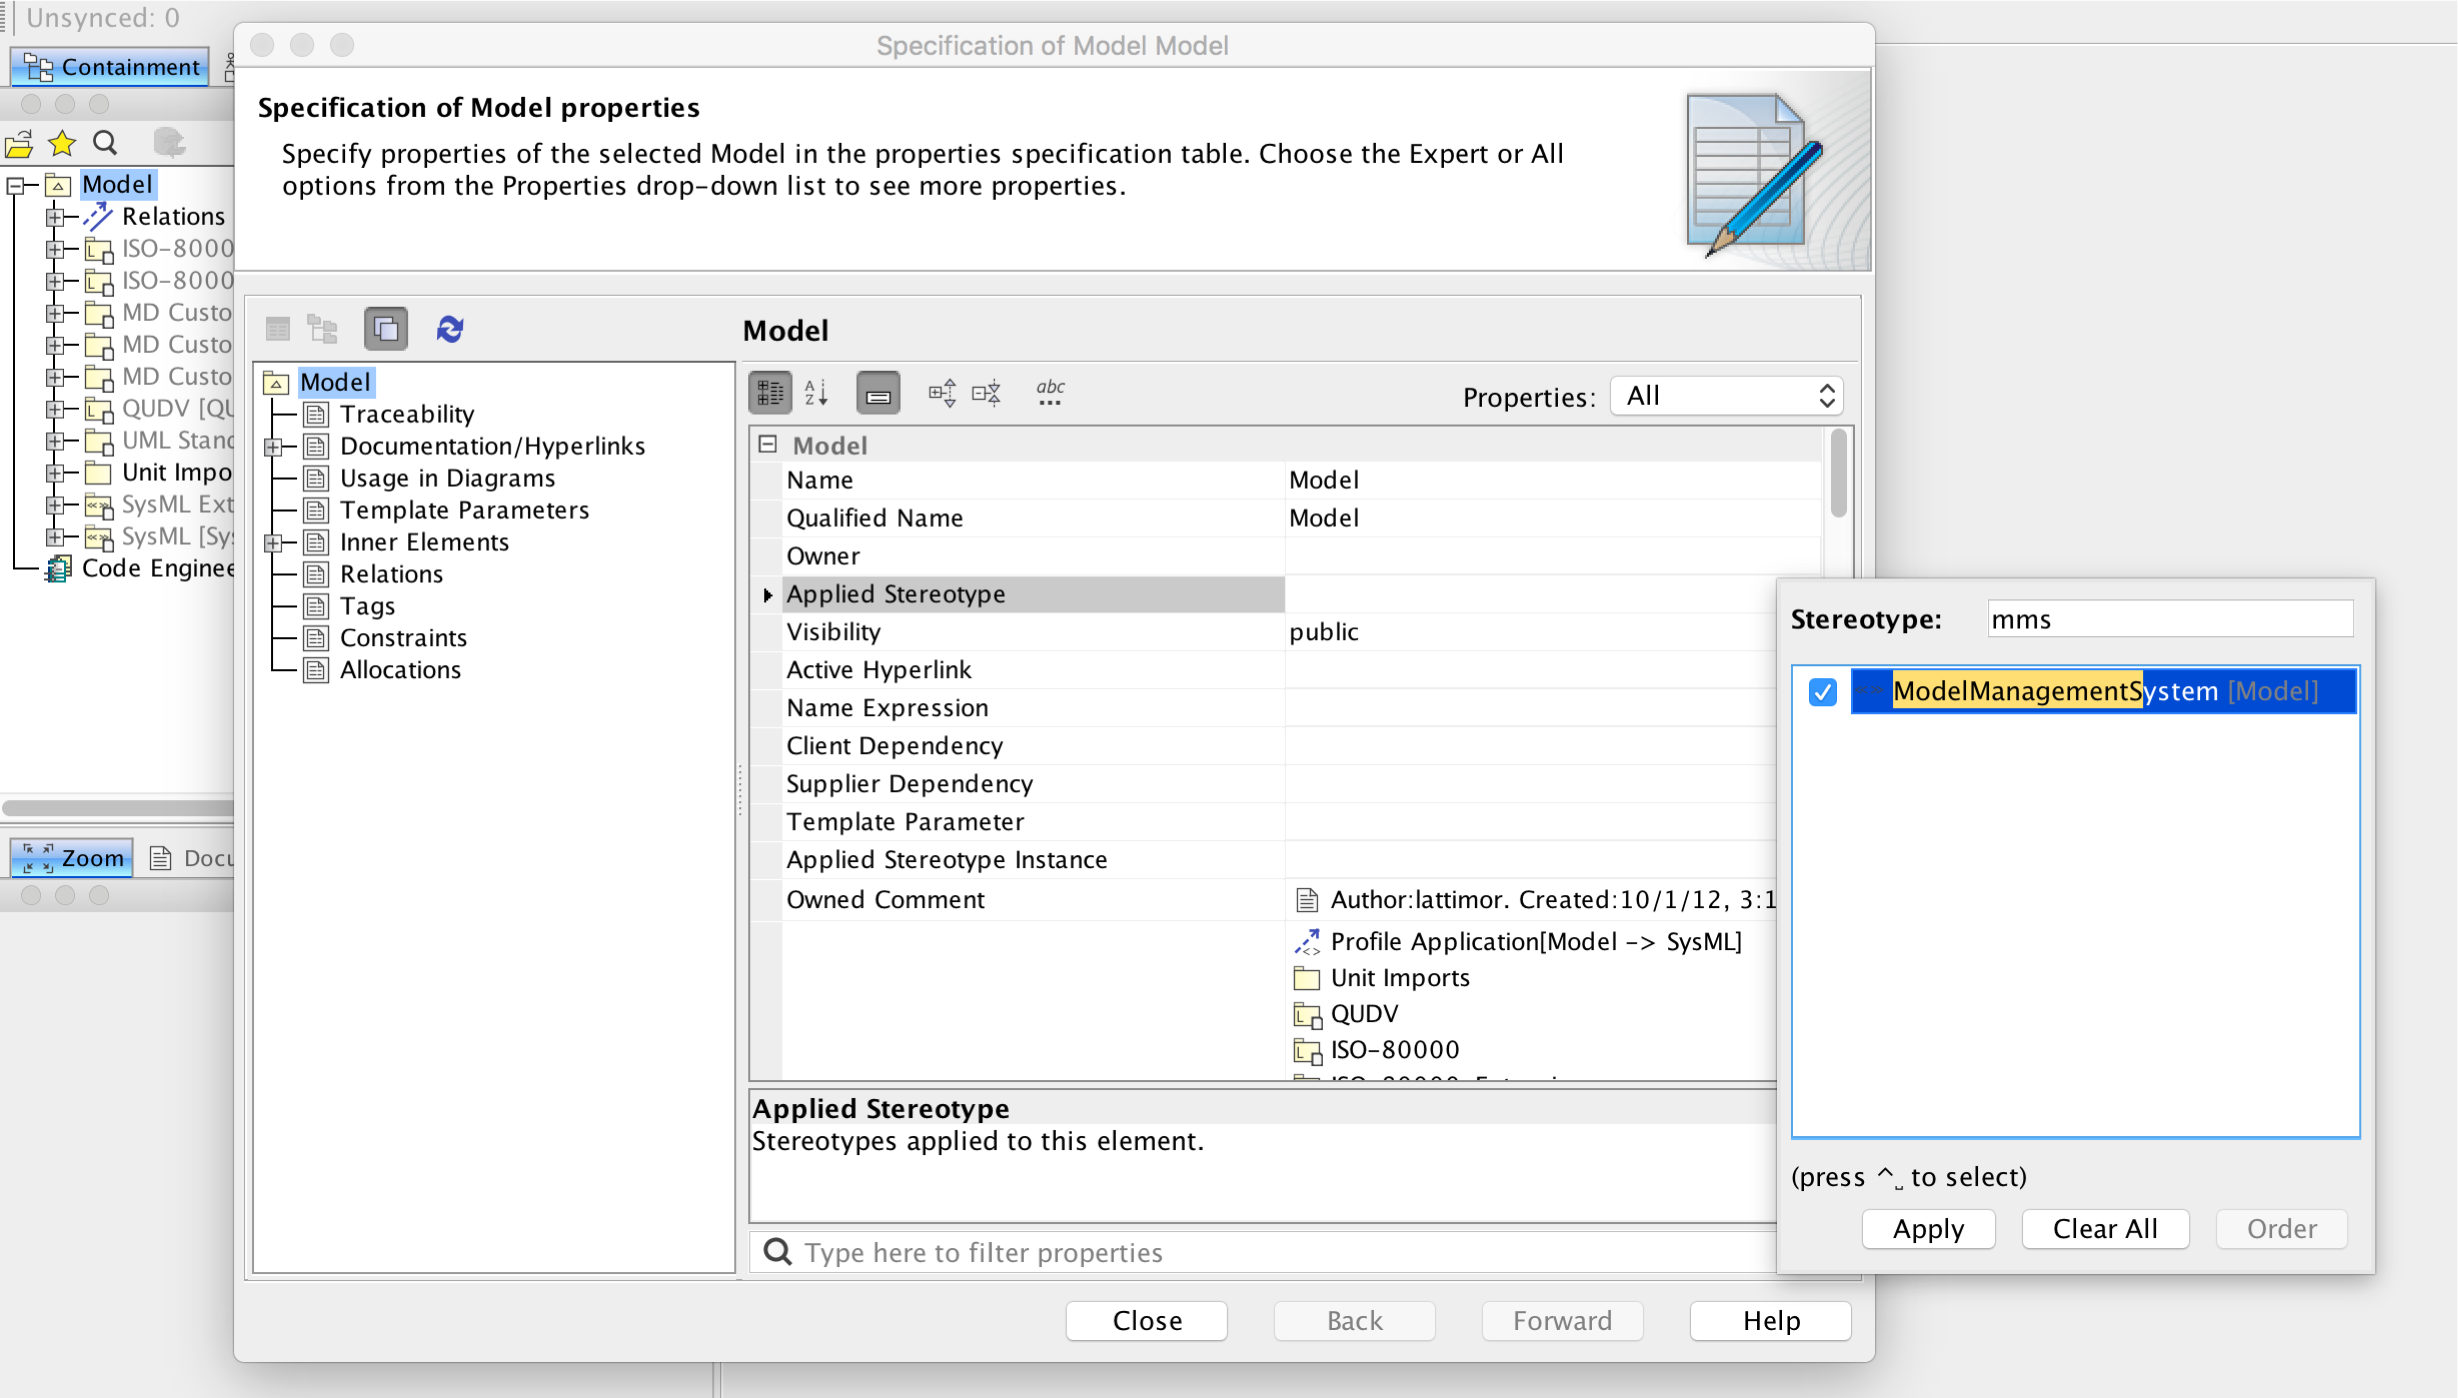
Fig. 6 Adding MMS Stereotype
Actions #. Open “Model” package specification (double click package or right click package > specification) #. Scroll down to MMS section #. Enter server name as MMS URL (e.g. https://mms.hostname.com) #. Select “Close”
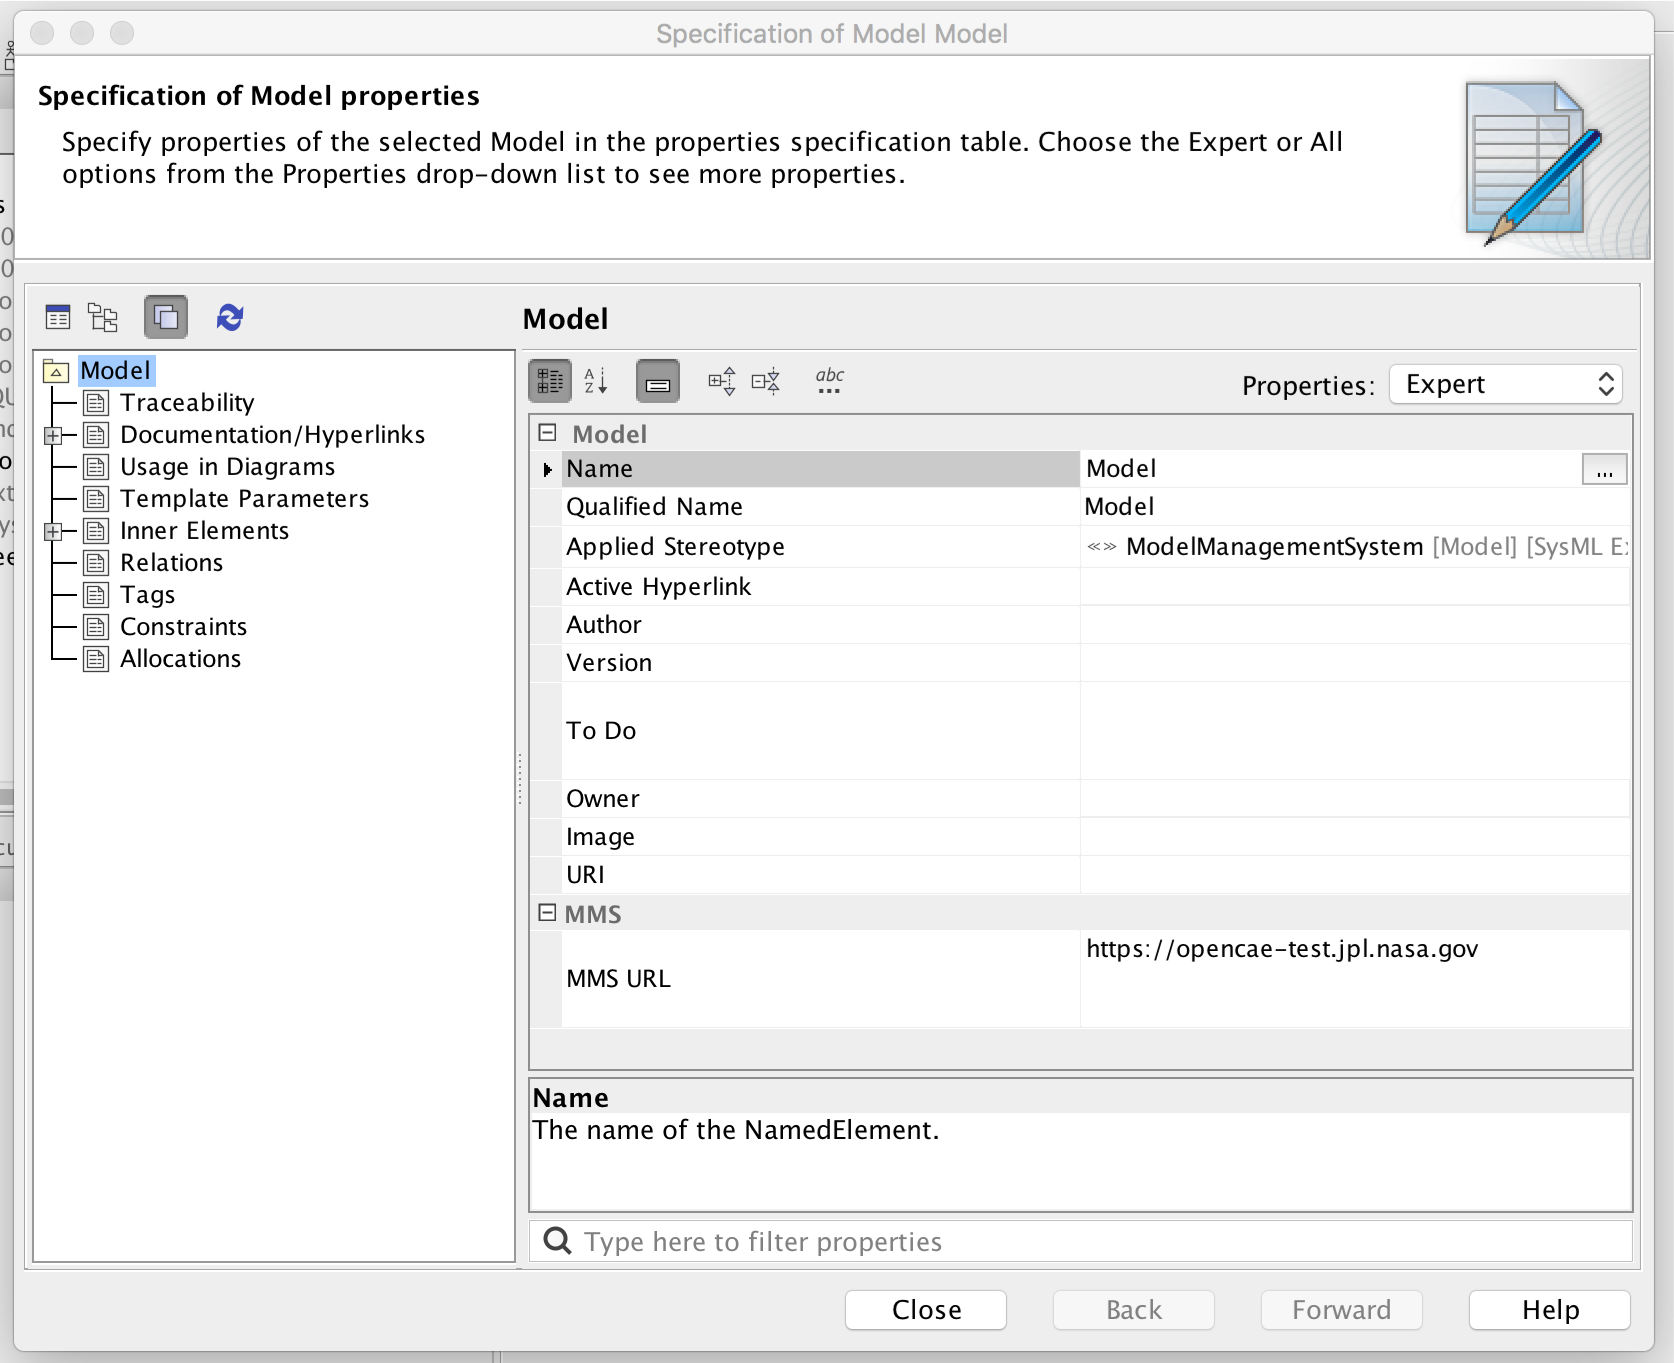
Fig. 7 Specification of Model Properties
Sync Project with MMS
Follow this procedure to initialize your project on the server.
Add Project to MMS
Login to MMS: Select “MMS” tab from top ribbon > Login > enter username and password > ok
Right click “Model” > MMS > Validate Models
Wait for validation window to see error
Right Click error in Validation window > Commit Project and Model. Note: Error will remain visible until validation window is closed
- Wait for “Choose MMS Org” dialog to pop up > Select desired Org > ok
New Org may be created by selecting the “New…” option from the bottom of the list and following the prompts
Again, Right click “Model” > MMS > Validate Models
Wait for validation window to see “holding bin missing in client” error
Right click error > update element from MMS (holding bin should now be present in the containment tree)
Save project locally by File > Save Project